

This article outlines how to change a basic IP address of a device using Hardware Manger in ControlSpace Designer.
Relevant Product(s)
- ControlSpace Designer
Procedure
When there is no DHCP server present, manually assigned static IP addresses will provide the most stable network conditions for most systems. ControlSpace Designer can set manual IP addresses for ControlSpace devices using the Hardware Manager.
Setting the Computer IP Address
The first step is to ensure that the computer’s IP address is set in a range that will match the ControlSpace device.
Working with ControlSpace Designer v5.9 or later
After ControlSpace v5.9.0 firmware, and with all ControlSpace EX devices, the default IP on ControlSpace Devices will be Link Local (169.254.x.x /16), if no DHCP is supported on the network.
Set the computer’s IP address to DHCP or “Obtain an IP address automatically”. This will cause the computer to obtain an IP address in the same manner as the ControlSpace Device. If there is a DHCP server available, the computer will obtain an IP address from the DHCP server. If there is no DHCP server available, the computer will assign itself an IP address in the 169.254.x.x range.
Working with ControlSpace Designer v5.8.2 or earlier
When working with PowerMatch amplifiers and ControlSpace devices other than the EX series, if DHCP is not supported, the computer’s IP address and subnet mask will need to be set manually. The default IP addresses for devices other than the ControlSpace EX products will be;
-
192.168.0.40 – 4-channel PowerMatch amp
-
192.168.0.80 – 8-channel PowerMatch amp
-
192.168.0.160 – ESP Digital Signal Processors
-
192.168.0.176 – CC-64 Control Center
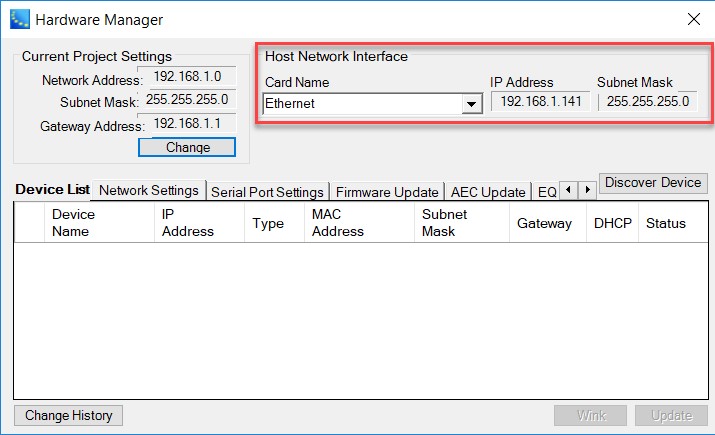
Host Network Interface
Next, open the Hardware Manager from the System menu and confirm that ControlSpace Designer is configured to use the correct network interface. Many computers will have multiple network interfaces available and ControlSpace Designer needs to know which interface to use. Click the drop-down list under Host Network Interface, and select the network that has ControlSpace devices connected to it.
Current Project Settings
Network settings for the currently open Project in ControlSpace Designer must match the network settings being used by the hardware. The Project network settings can be modified by clicking the Change button in the Current Project Settings area. Match the Project Network Address and Subnet Mask to the IP range of the computer and ControlSpace Devices. The Gateway Address is often unused and may be left at the default value.
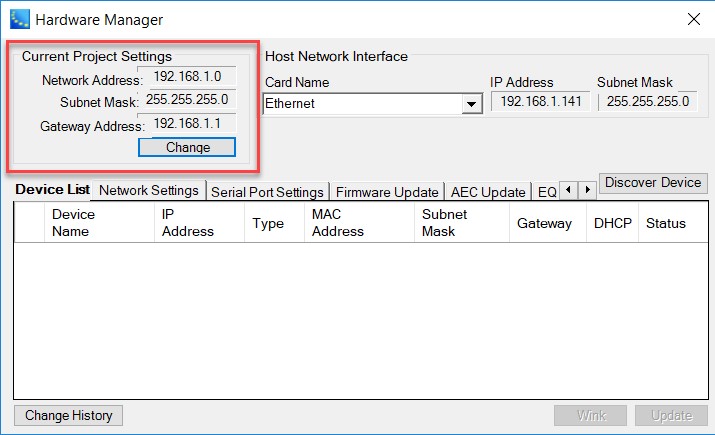
After the Project settings are correct, click on the Discover Devices button in the Hardware Manager. Any attached ControlSpace devices in the correct IP range will appear in the Device List.
Setting a static IP address in the same subnet
In the Hardware Manager’s Device List, click on the checkbox to the left of the device you want to change. This will expand the Hardware Manager to include the Network Settings controls. In the Network Connection section, click on the radio button next to Static IP.
Note that the fields for New IP Address are only partially editable. When assigning a new IP address to a ControlSpace device, the new address must be within the subnet defined by the Current Project Settings. To change the automatic IP address to a static IP address in this range, enter the new address in these fields and then click the Update button. Note that the Update button is at the bottom of the Device List next to the Wink button. When prompted to reboot the device, click OK.

Setting a static IP address in a different subnet
To set a ControlSpace device to an IP address in a different subnet, first change the Current Project Settings. To do this, click on the Change button in the Current Project Settings area. Only some of the fields in the New Project Network Address are editable. These are determined by the Subnet Mask setting, and ControlSpace Designer will only allow values to be entered that fall within the selected subnet. In most cases, the subnet mask first must be entered first and then the Project Network Address can be entered. For example, to use static IP address of 172.16.40.101, first change the Subnet Mask to 255.255.255.0, and then change the Project Network Address to 172.16.40.0.
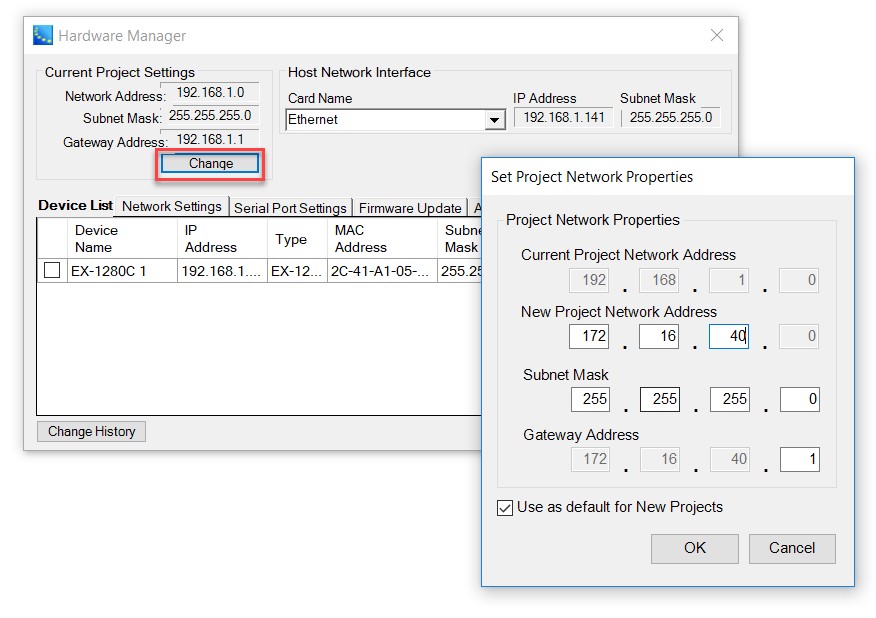
After making these changes, the hardware in the Device List will show a status of, “Out of project”. This indicates that the hardware’s current IP address does not match the Project settings. Select the checkbox next to the device to be changed and click the radio button next to Static IP. Again, not all the IP address fields can be changed, but it is now possible to select an address in the 172.16.40.0 range. Enter, “101” in the available IP address field and click the Update button. Note that the Update button is located at the bottom of the Device List, next to the Wink button. When prompted to reboot the device, click OK.

If there are additional devices that need to be changed, select each device in the Device List and update the IP address.
After the ControlSpace device has rebooted, it will be using the new IP address. Before the device is able to be discovered the computer must be changed to the updated device IP range. To repopulate the Device list, change the computer’s IP address to an address in the new range, reopen the Hardware Manager, and click the Discover Devices button.